
After my last grow there were couple of grams sweet sweet leaves rolling around .... waiting my laziness to go away.... so ..... the time has come.....


I went to the local Italian cheese shop and brought 100% pure natural butter around 400g ... pretty enough i guess for my 50g sweet sweet leaves..... if you don't have sweet sweet leaves you can grind pure stuff up to you....
So I grind them very very very very well ... boiled them on the oven with a pan inside a pan full with water so it cannot boil or fry ..... in general in water bath .... for around 2 hours .........and 2 more to get calm almost cold ... but not too much so you can actually squeeze the oil from the garbage and keep it safe inside a dish or box or whatever......
HOW TO MAKE IT WITH OIL INSTEAD OF BUTTER CLICK HERE


And use it for the shit bellow ..... i can tell you one of these cubes will kick your ass for about 7-8 hours if you are not over 80kilos .... if you are :) well you can always shoot 2 of these ....
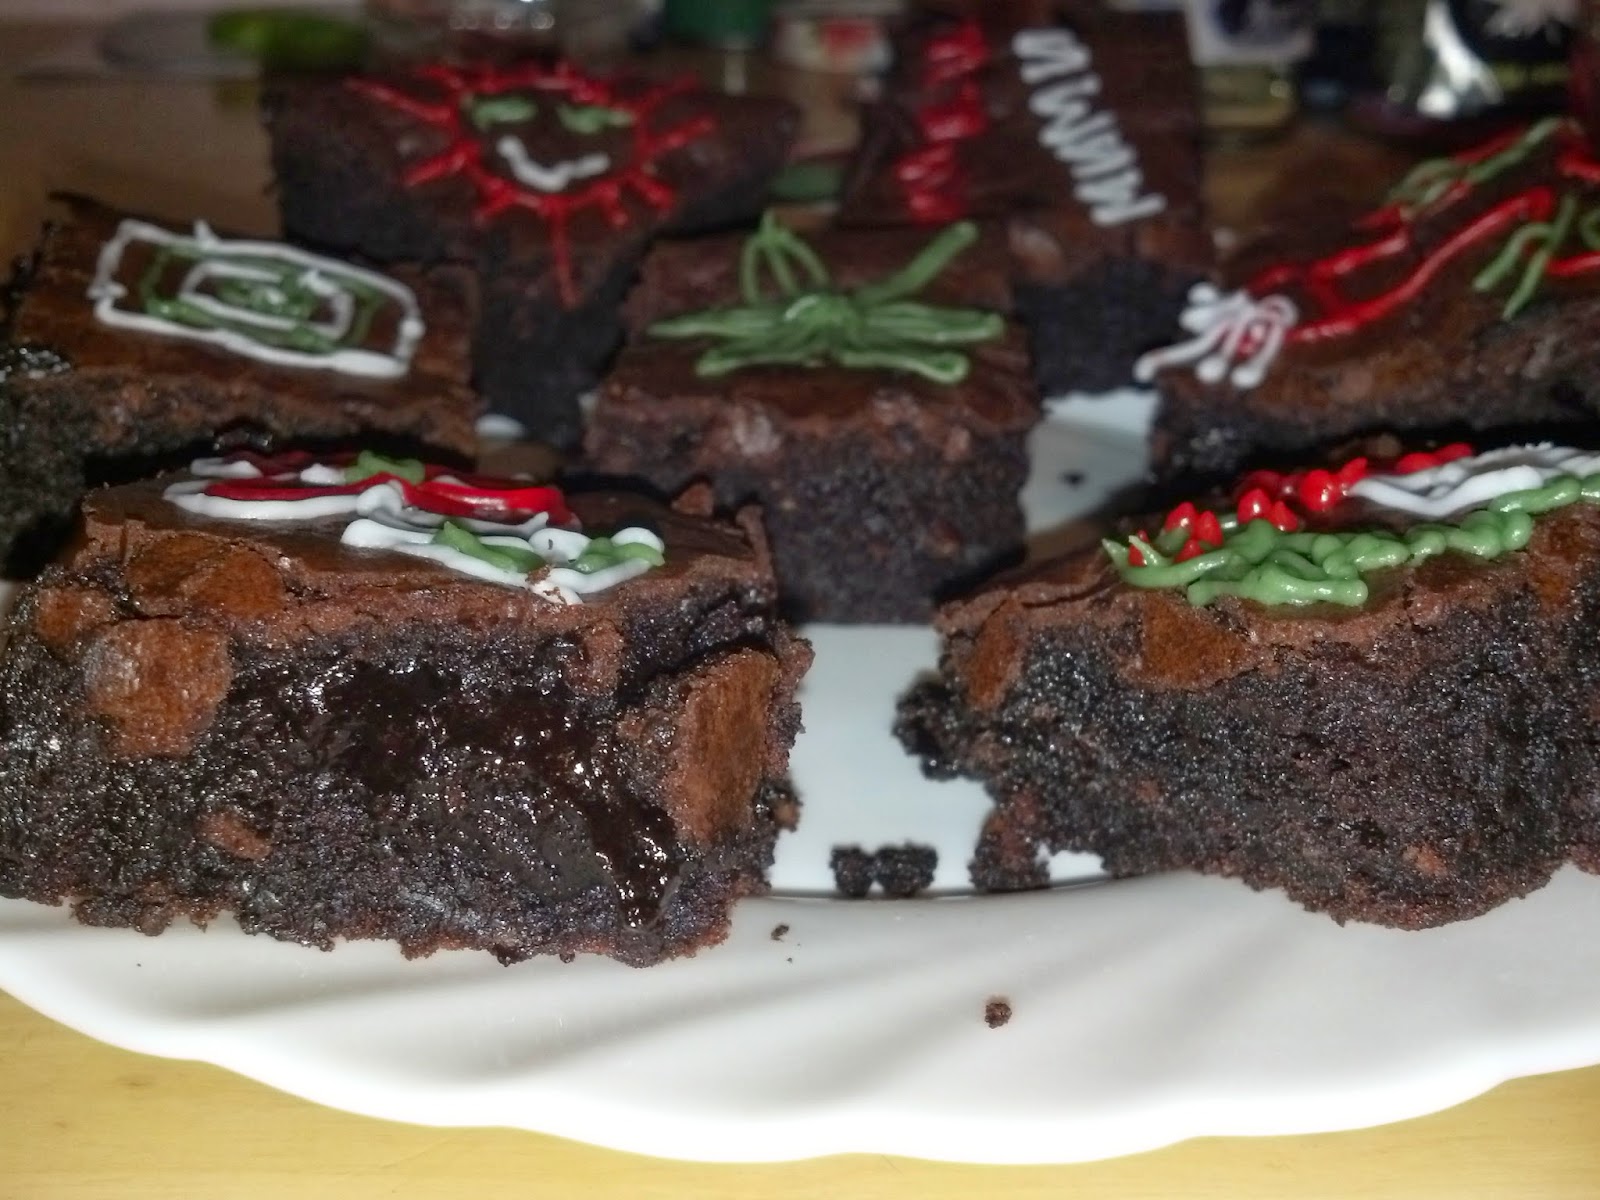
With the butter i had ... i made this twice ..... both times the results were pure killers ..... around 20 space cube pieces each time .......
......njoint everyone
Ingredients
185g Canna-butter (How to make canna-butter look around my blog)
200g best dark chocolate
55g plain flour
60g cocoa powder
50g white chocolate
50g milk chocolate
3 large eggs
275g golden caster sugar
2 Vanilla beans , 1 spoon vanilla extract , half tea spoon cinnamon , Candy-sweet dry orange peals and any other flavor you like in general nuts works too
SPACE MUFFINS RECIPE CLICK HERE


Method
Cut 200g canna-butter into smallish cubes and tip into a medium bowl. Break 200g best dark chocolate into small pieces and drop into the bowl. Fill a small saucepan about a quarter full with hot water, then sit the bowl on top so it rests on the rim of the pan, not touching the water. Put over a low heat until the butter and chocolate have melted, stirring occasionally to mix them. Now remove the bowl from the pan. Alternatively, cover the bowl loosely with cling film and put in the microwave for 2 minutes on High. Leave the melted mixture to cool to room temperature.
While you wait for the chocolate to cool, position a shelf in the middle of your oven and turn the oven on to fan 160C/conventional 180C/gas 4 (most ovens take 10-15 minutes to heat up). Using a shallow 20cm square tin, cut out a square of non-stick baking parchment to line the base. Now tip 55g plain flour and 60g cocoa powder into a sieve held over a medium bowl, and tap and shake the sieve so they run through together and you get rid of any lumps.
With a large sharp knife, chop 50g white chocolate and 50g milk chocolate into chunks on a board. The slabs of chocolate will be quite hard, so the safest way to do this is to hold the knife over the chocolate and press the tip down on the board, then bring the rest of the blade down across the chocolate. Keep on doing this, moving the knife across the chocolate to chop it into pieces, then turn the board round 90 degrees and again work across the chocolate so you end up with rough squares.
Break 3 large eggs into a large bowl and tip in 275g golden caster sugar. With an electric mixer on maximum speed, whisk the eggs and sugar until they look thick and creamy, like a milk shake. This can take 3-8 minutes, depending on how powerful your mixer is, so don’t lose heart. You’ll know it’s ready when the mixture becomes really pale and about double its original volume. Another check is to turn off the mixer, lift out the beaters and wiggle them from side to side. Add the flavors .... all kind of vanillas , cinnamon or extracts , nuts and dry peals and etc. If the mixture that runs off the beaters leaves a trail on the surface of the mixture in the bowl for a second or two, you’re there.
Pour the cooled chocolate mixture over the eggy mousse, then gently fold together with a rubber spatula. Plunge the spatula in at one side, take it underneath and bring it up the opposite side and in again at the middle. Continue going under and over in a figure of eight, moving the bowl round after each folding so you can get at it from all sides, until the two mixtures are one and the colour is a mottled dark brown. The idea is to marry them without knocking out the air, so be as gentle and slow as you like – you don’t want to undo all the work you did in step 4.
Hold the sieve over the bowl of eggy chocolate mixture and resift the cocoa and flour mixture, shaking the sieve from side to side, to cover the top evenly. Gently fold in this powder using the same figure of eight action as before. The mixture will look dry and dusty at first, and a bit unpromising, but if you keep going very gently and patiently, it will end up looking gungy and fudgy. Stop just before you feel you should, as you don’t want to overdo this mixing. Finally, stir in the white and milk chocolate chunks until they’re dotted throughout. Now your mixing is done and the oven can take over.
Pour the mixture into the prepared tin, scraping every bit out of the bowl with the spatula. Gently ease the mixture into the corners of the tin and paddle the spatula from side to side across the top to level it. Put in the oven and set your timer for 25 minutes. When the buzzer goes, open the oven, pull the shelf out a bit and gently shake the tin. If the brownie wobbles in the middle, it’s not quite done, so slide it back in and bake for another 5 minutes until the top has a shiny, papery crust and the sides are just beginning to come away from the tin. Take out of the oven.
Leave the whole thing in the tin until completely cold, then, if you’re using the brownie tin, lift up the protruding rim slightly and slide the uncut brownie out on its base. If you’re using a normal tin, lift out the brownie with the foil. Cut into quarters, then cut each quarter into four squares and finally into triangles. These brownies are so addictive you’ll want to make a second batch before the first is finished, but if you want to make some to hide away for a special occasion, it’s useful to know that they’ll keep in an airtight container for a good two weeks and in the freezer for up to a month.
Original Recipe comes from BBC Good Food magazine, May 2003 ,
but the upgrade version is mine ......


